Creating a Stereoscopic Conversion of a Single 2D Image

Before you panic and start screaming and running away from the big bad stereoscopy monster, let me reassure you that this is actually a fair bit more straightforward than it seems.
Things you need:
Disclaimer: Please, please please don't do this with someone else's image. Even if you modify an existing image you got off the internet or from someone else's DA page without their permission, it's still a copyright infringement.
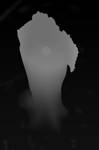
99.9% of the work involved in this is creating a Depth map. What is a depth map you ask? A depth map is a greyscale version of your image, where the things closest to the front/sticking out of the screen are white, and the things furthest from the camera, sunken into the screen are black.
Here are some examples:


There are a few ways to get one of these.
How to make a Depth Map
Method 1: If your image is 3-Dimensional Art, Generate a Depth Map
If the image you want to make is 3-Dimensional Art (done on a computer and you can rotate around the model), you can create a depth map inside your 3D package. This varies from 3D package to 3D package, so a google search is a good way to start. Simply google "Make depth map in <<your3dpackage>>".
Of course, because it's actually in 3D, you can also just create a stereoscopic picture by doing two renders between which you slightly shift the camera, or using a stereoscopic camera to render directly (Maya actually even has anaglyph preview!).
Method 2: Painting a Depth Map
Painting a depth map sounds pretty scary. It's not really that bad, because mostly you're tracing over an existing image that you've made.
Simply paint over your picture, black for your far background, white for the very front tips and shades of grey in between. It's a good idea to work in layers, that way you can adjust if necessary.
It doesn't have to be perfect or immaculate, usually you can get away with a lot.
Method 3: Gradient map and Curves
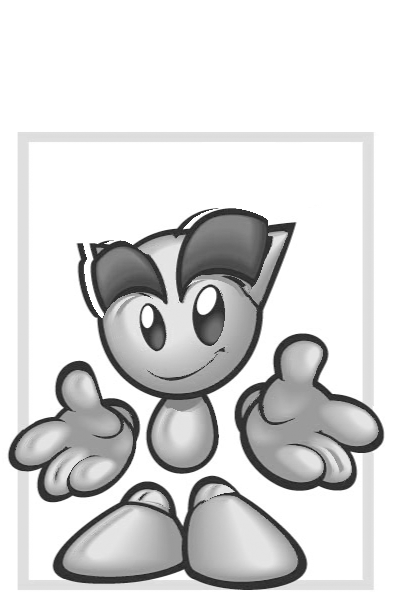
With a simple image like the one of Fella below, it's enough to simply convert him to greyscale and increase the contrast a lot, because his highlights are pretty much where you want the image to bulge.
Applying a Depth Map
You now have a single 2D image (Below Left) and a depth map (Below Right):


I apologise now to people who use something other than Photoshop. You need some sort of displacement filter, please do a search because I can't account for every software out there. Here's how you do it in Photoshop:
:buletgreen: Save your depth map as a PSD file. In a separate file, open the 2D image.
:buletgreen: Duplicate the layer, so that you have your original image one one layer, and a duplicate of it on the layer above. Call the original image Left, and the duplicate Right.
:buletgreen: With the second layer visible and selected, click the Filter menu and select Distort - Displace.
You may notice a bit of artefacting. The more warped your picture looks, the less your image is going to work correctly in 3D. You can fix this up manually with a paintbrush, just try to stick to the lines.
Here's Fella before (Below Left) and after being fixed (Below Right)

Combining the two images to make Stereo
Once this is done you can turn the top layer on and off to get an idea of what the 3D will look like.
Now you simply Use this tutorial to make the stereo type of your choice and ta da! A 2D to 3D conversion!